Multi-camera video production can elevate the quality and dynamism of your content—from live events and interviews to studio broadcasts.
However, setting up a multi-camera system can (rightly!) seem complex.
This guide breaks down the process, recommending key equipment and placement strategies, and covering synchronization techniques (timecode, genlock, and more) for smooth operation. We’ll also explore live-streaming integration (leveraging Ikan’s broadcast-over-IP and PoE expertise) and share practical workflow tips.
Whether you’re a system integrator designing a studio, a media professional running a production, or a dealer advising clients, these actionable insights will simplify complexity and empower you to create without limits. Let’s dive in.
Essential Components for Multi-Camera Productions
Building a professional multi-camera setup requires carefully chosen gear. By way of introduction, take note of the key equipment categories and what to look for in each:
Cameras
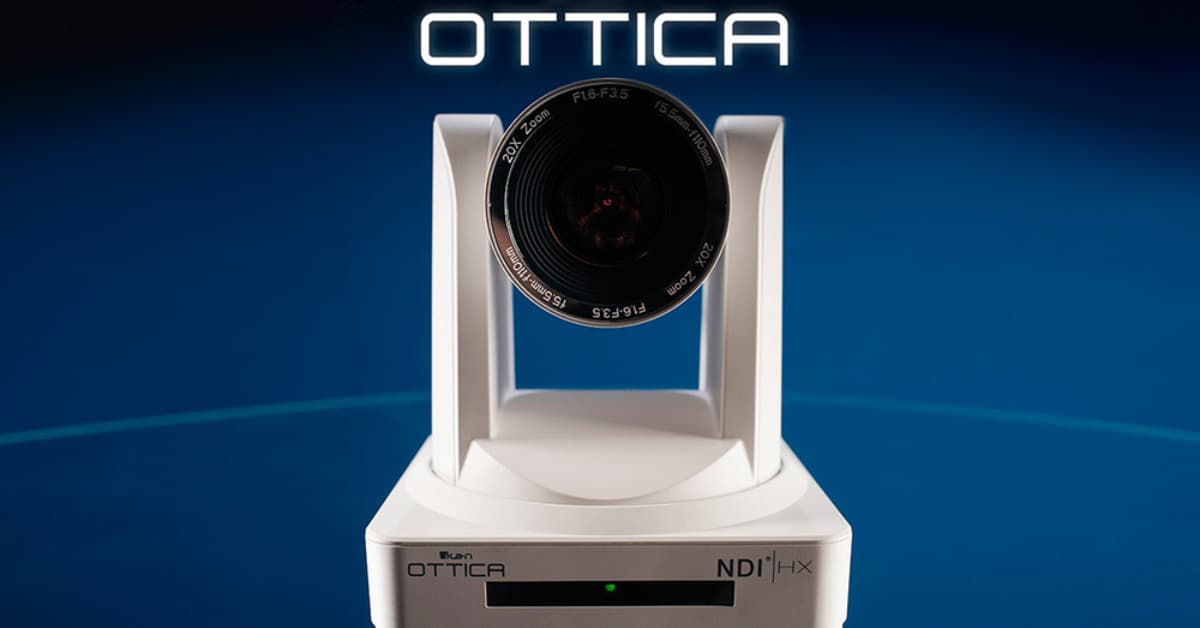
Choose cameras that suit your production style and output needs. Options include high-resolution studio/Broadcast cameras, versatile mirrorless or DSLR cameras with clean HDMI/SDI output, or PTZ (pan-tilt-zoom) cameras for remote control. For instance, Ikan’s OTTICA™ PTZ cameras deliver full HD video with NDI over a single cable (supporting PoE power).
Ensure all cameras can output the same resolution and frame rate to make switching and syncing easier. Having identical camera models or at least consistent image settings helps maintain a uniform look across angles.
Video Switcher
A multi-camera switcher is central to live mixing between feeds. You can opt for hardware switchers (like Blackmagic ATEM or Roland units) for tactile control and reliability, or use software switchers (like vMix, Wirecast, or OBS Studio) on a computer for flexibility. Make sure the switcher supports the number of inputs and the formats your cameras output.
For IP-based workflows, ensure the switcher/software supports network video protocols (e.g. NDI) so you can ingest camera feeds over Ethernet. This is crucial if you’re leveraging Ikan’s broadcast-over-IP approach, where cameras and gear might send video and control signals through the network. Some switchers also offer built-in streaming encoders and recording, which can streamline your workflow.
Tripods and Camera Support
Each camera in a multi-cam setup needs stable support. Use sturdy tripods with fluid heads for smooth pan/tilt movements and to avoid shaky footage. Ensure all tripods are of appropriate height so cameras capture subjects at eye level (or whatever creative angle you intend) uniformly.
For moving shots, you might incorporate a slider or jib on one camera, but only if you have the crew to operate it without distracting from other angles. In studio environments, you might use pedestals or wall/ceiling mounts (especially for PTZ cameras).
Consistency is key – lock down framing so that when you cut between cameras, the shots feel cohesive, not jarringly different or misaligned. Also consider using tally lights (many switchers have outputs for these) so on-camera talent and operators know which camera is live.
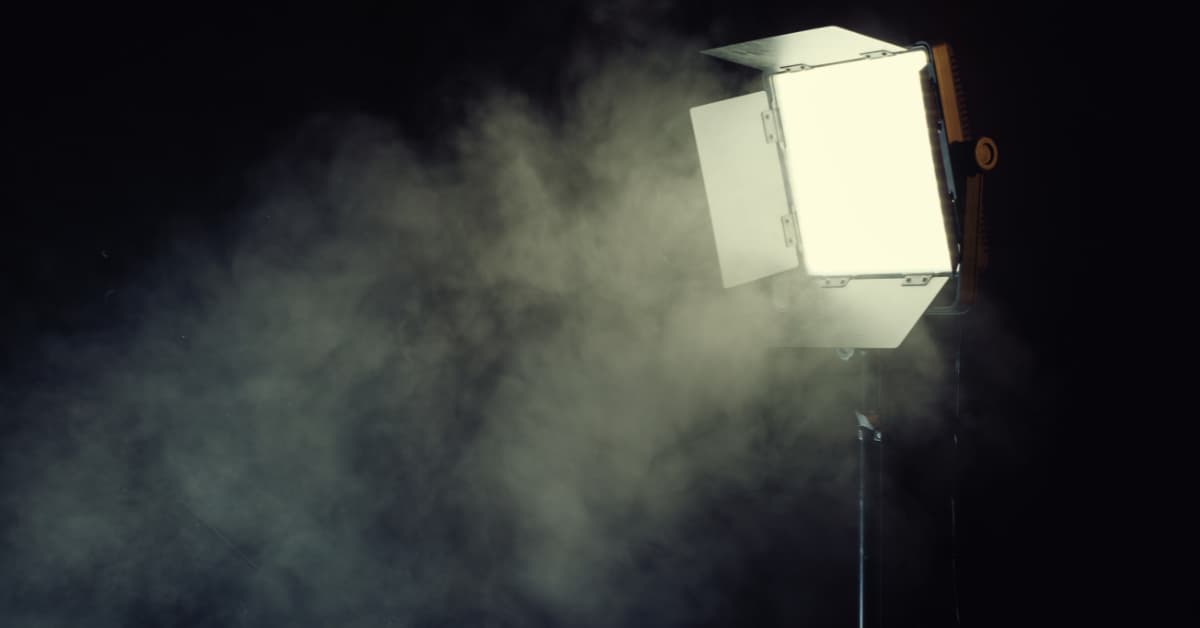
Lighting
Good lighting is essential, more so when multiple cameras are capturing a scene from different angles. Aim for an even, soft lighting setup that flatters your subjects and works for all camera positions. A typical three-point lighting scheme (key, fill, back light) may need adaptation for multi-camera setup: for example, additional fill lights to cover wider angles or separate lights for different set areas.
LED panel lights are a popular choice for multi-camera setups due to their cool operation and adjustable output – Ikan’s own LED panels (like the Lyra series) even come in PoE versions that can be powered and controlled via Ethernet for simplified cable management. When using multiple cameras, avoid placing lights where they cause glare or flares into a particular camera; flag or diffuse lights as needed to keep the image quality consistent. The goal is a balanced illumination that doesn’t require each camera to wildly change exposure or color settings.
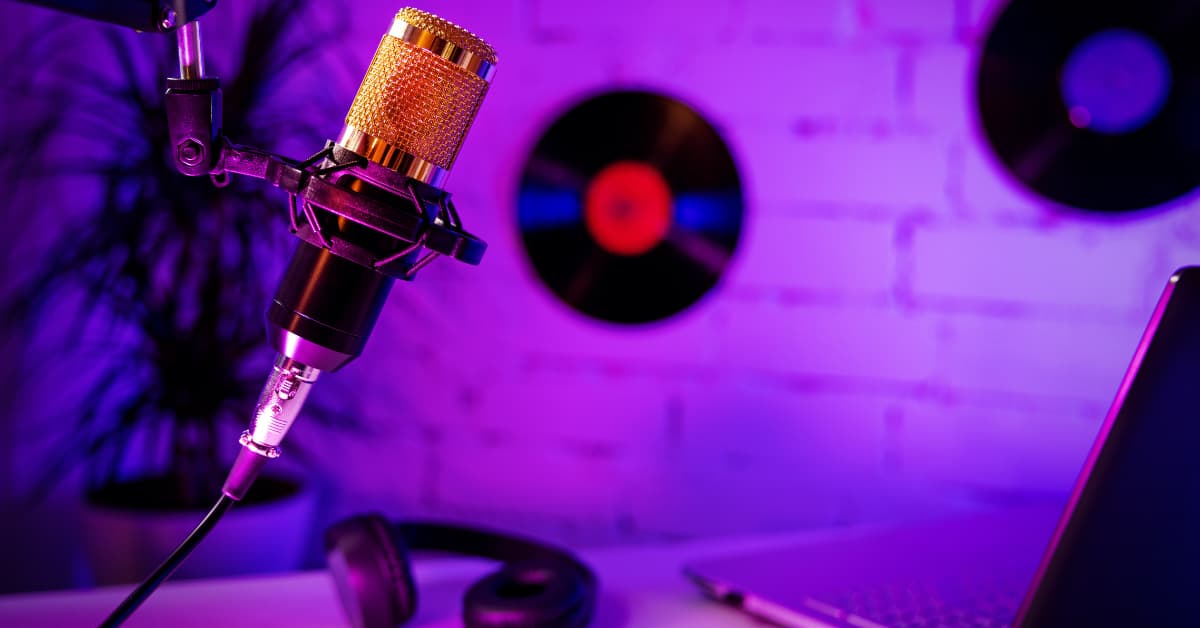
Audio Solutions
Audio is half the production value. In multi-camera shoots, you typically capture audio separately (through a mixer or dedicated recorder) rather than relying on camera mics. Equip your subjects or talent with quality microphones: lavalier mics for interviews/presenters, shotgun mics on booms for panel discussions or events, and perhaps a handheld mic for audience Q&A. Use a multi-channel field mixer or audio interface to mix these sources in real-time or at least record them isolated.
Synchronization between audio and video is critical – many productions use a clapboard or electronic slate at the start of recordings if not using timecode (more on sync below) to mark alignment. Monitor audio levels throughout and consider a backup audio recorder for safety. Also, set up an intercom or communication system (wired or wireless headsets) for the crew so camera operators, the director, and audio tech can coordinate without confusion, especially during live events.
Control and Software
Finally, don’t overlook the control systems and software that glue the multi-camera workflow together. If using PTZ cameras, an IP camera controller or software control (on a tablet or PC) will let a single operator adjust angles and zoom presets across multiple cameras. Ikan offers an IP PTZ Camera Controller for their OTTICA cameras, for example.
Live-streaming software (or hardware encoder) is needed if you’re broadcasting to the web – OBS Studio, for example, can take your switched feed (or even handle the switching via the Studio Mode) and stream to YouTube, Facebook, etc. For recorded productions, video editing software with multi-cam editing support (Adobe Premiere Pro, DaVinci Resolve, Final Cut Pro, etc.) is invaluable; it allows you to import all camera angles and cut between them in post-production seamlessly. Also consider timecode generators or sync software if your workflow demands perfectly synchronized recordings (covered next).
Camera Placement Strategies for Different Productions
How you position cameras can make or break a multi-camera production. Different scenarios call for different strategies to capture all important angles while maintaining visual coherence.
Below we outline camera placement approaches for interviews, live events, and studio setups:
Interviews & Talk Shows
For a one-on-one interview or a panel talk show, the goal is to capture each person in a flattering composition and also show the interaction. A common configuration for a two-person interview is three cameras:
- Camera A (Wide Shot): A two-shot framing both interviewer and interviewee in one view. This establishes the scene and relationship between them.
- Camera B (Close on Subject): A tight shot focused on the interviewee (primary subject). This is usually framed at an angle slightly off the interviewer’s eyeline, giving a natural look of the interviewee addressing the interviewer. Position this camera roughly at eye level with the subject, about 15° off the axis of interaction.
- Camera C (Close on Interviewer): Similarly, a tight shot on the interviewer, about 25–30° off axis on the same side of the line as Camera B. This captures nods and questions, useful for editing and when the interviewer is speaking.
All cameras should stay on one side of the imaginary 180° line between interviewer and interviewee to maintain consistent eyelines (this avoids the subjects appearing to switch looking directions when cutting angles).
If it’s a panel or multi-person talk show, dedicate one camera per primary speaker (framed medium or close) and one or two wide cameras covering the group. Plan the framing so that each camera’s shot has a purpose: e.g., one main angle and others providing cutaways or emphasizing reactions. In tight spaces, favor slightly wider lenses; in larger studios, you can use longer lenses for close-ups without being intrusive. Mark spots on the floor for chairs or stand positions so that your subjects remain in focus and well-composed on all cameras.
Live Events & Performances
Live events (concerts, conferences, sports, ceremonies, houses of worship services, etc.) benefit enormously from multi-camera coverage. Here, camera placement is about capturing both the big picture and the key details:
- Main Wide Camera: Position one camera to capture the entire stage or venue from a central vantage point. This is your safety shot that sees everything (e.g., the full altar in a church, the entire stage in a theater, or the whole field in sports).
- Close-Up/Feature Cameras: Have at least one or two cameras dedicated to closer shots of the action. In a conference, that could be a camera zoomed in on the speaker at the podium. In a concert, you might have one camera focused on the lead performer and another roving or on a tripod for cutaways (like instrumentalists or audience reactions).
- Alternate Angles: For added depth, place a camera at a different angle from the main (for example, a side angle of the stage or high angle from a balcony). This can be static or operated. These shots add variety — think crowd perspective or an over-the-shoulder view of a speaker with the audience in frame.
- PTZ or Mobile Camera: PTZ cameras can be invaluable in live events. Mount a PTZ on truss or a ceiling mount to get angles impractical for manned cameras (like a top-down or a behind-the-crowd reverse shot). They can be remotely controlled to pan/tilt/zoom as needed. If you have the budget and crew, a roaming handheld camera or a camera on a stabilizer can capture dynamic up-close footage (common in sports or wedding videography for on-the-ground views).
When placing cameras for events, consider line-of-sight and obstructions: e.g., put cameras on raised platforms or tripods high enough to see over an audience. Also, coordinate coverage zones so that cameras don’t all chase the same subject; assign each a primary focus (one wide, one tight on podium, one on audience, etc.) to ensure you’re catching all the action. If possible, conduct a quick rehearsal or communication check so operators know the event rundown (for instance, which speaker or performance is next) and can be in position ahead of time.
Studio Setups & Broadcast Environments
In a controlled studio, you have the advantage of planning everything in advance. Studio multi-camera setups are common for news broadcasts, talk shows, product demos, and instructional videos. Here are some placement tips for studio scenarios:
- Primary Camera (Center): Often, a head-on camera serves as the main view (e.g., the news anchor looking directly into Camera 1). This provides a direct, engaging shot for the audience.
- Secondary Cameras (Off-center): One or two additional cameras are placed at angles (say 30° to 45° off center) to get alternative views. In a news or talk show, these might be slightly profile shots of each host or a guest, which can be used when that person is speaking or to add visual interest.
- Overhead or Specialty Angles: If the production involves demonstrations (cooking shows, tech reviews, etc.), an overhead camera can capture tabletop action. Another camera could focus on a particular area (like a close-up of hands crafting something). These cameras are used when the content calls for it, and can remain idle otherwise.
- Wide Establishing Camera: Similar to live events, a wide shot in a studio (capturing the entire set) is useful for intros, transitions, or backup. This might be mounted on a track or pedestal to allow a smooth push-in/out movement for a cinematic touch.
Because studio productions often use professional cameras with genlock and timecode, you can ensure all camera feeds are electronically in sync (preventing any flicker or timing issues when cutting live). Also, studio cameras might have teleprompters – ensure any such accessory is accounted for in placement (usually the main camera). Lighting in studios is usually fixed and even, but double-check that each camera angle is well-lit (no odd shadows on one angle only). Mark the floor for any areas talent might move to, and check all cameras can cover those positions without going off framing. Finally, use an intercom system for the director to cue camera operators (e.g., telling Camera 2 to prepare for a close-up) – in a studio, this real-time coordination is key to professional results.
Synchronizing Multiple Cameras: Timecode, Genlock, and More
When multiple cameras (and separate audio recorders) are rolling, keeping everything synchronized is crucial. Sync issues can cause headaches in post-production and glitches in live switching. There are a few methods to ensure all your footage and audio line up perfectly:
- Timecode – Timecode is basically a timestamp recorded with each frame of video (e.g., 01:23:45:12). If all cameras share a common timecode, their footage can later be aligned by this timestamp. Lacking synchronization, matching up footage from each camera in post-production can feel like solving a puzzle without having all of the pieces. Timecode prevents those problems by providing a common reference point across all devices.In practice, you might use a timecode generator (master clock) that feeds each camera and audio recorder the same signal (this can be wired or via small wireless timecode sync units). Once jam-synced, devices continue recording with that reference.The benefit is in editing: you drop all clips into a sequence and they automatically line up. Many modern editing programs can read timecode and create a multi-camera timeline in seconds.
- Genlock – Timecode syncs the timestamps, but genlock syncs the frame timing. In high-end live productions or scenarios with long continuous takes, genlock ensures each camera’s sensor is capturing frames in lockstep with the others. Essentially, one device (or an external generator) sends out a sync pulse that forces all cameras to start each frame at the exact same time. This prevents slight drift or latency differences. Genlock is especially useful in live switching (so cuts are seamless without a frame of delay) and for 3D or VR capture (where two cameras must be perfectly in phase). Genlock works along with timecode to ensure both timing and frame alignment.If your cameras support genlock input (often through a BNC connection labeled “Genlock In” or “Sync”), connecting them to a common sync generator will drastically tighten synchronization.However, note that genlock alone doesn’t provide a reference for aligning clips in post – it’s usually paired with timecode. Genlock is more of a live/technical sync, whereas timecode is for editorial sync.
- Software-Based Sync – Not every production has timecode or genlock-capable gear, especially smaller DSLR or mirrorless cameras. In those cases, you can rely on software synchronization during editing. Many NLEs (non-linear editors) offer automatic syncing via audio waveforms. The principle: if all cameras (and the audio recorder) captured the same clap or sound spike, the software can line up the clips by matching audio patterns. You can aid this by doing a loud clap or using a clapboard at the start of recording — a traditional yet effective method. Additionally, some solutions use sync markers or even time-of-day metadata if the cameras clocks were roughly aligned. Software sync isn’t instant during production, but it saves enormous time in post if done right, sparing you from manually aligning clips. Just be sure each camera had a clear audio reference (built-in mic is fine for reference audio) and consistent start/stop points.
In summary, for the most seamless workflow, professionals often jam-sync timecode across all devices and use genlock for live work. This combo means every frame and every file is sync-ready.
But even if you lack that, modern software will assist in syncing multiple camera sources by audio or other methods. The key is to choose a sync strategy and stick to it for a given production.
Integrating Live-Streaming and IP Workflows
Live streaming a multi-camera production adds another layer of complexity — but with the right approach, it can be quite streamlined. Today’s broadcast industry is moving toward IP (Internet Protocol) based workflows, an area where Ikan’s expertise in broadcast-over-IP and PoE shines.
Here’s how to bring it all together:
Networked Video (AV-over-IP): Instead of running individual SDI or HDMI cables from every camera to your switcher/encoder, IP-based setups use standard network infrastructure. For example, cameras that support NDI or similar IP streaming protocols can send high-quality video feeds over Ethernet. This means a single CAT6 cable could carry video, audio, camera control, and even tally signals. Ikan’s OTTICA PTZ cameras, for instance, support NDI|HX and are powered via PoE, so one cable delivers power, control, and video.
The result is a cleaner install with less cable clutter and greater flexibility in camera placement (very useful in venues where running long video cables is impractical). Such PoE and AV-over-IP solutions simplify installation, reduce costs, and enhance flexibility, empowering creators to focus on telling their story.
Live Streaming Encoders & Software: If you’re using a hardware switcher, it may have a built-in streaming encoder (common in many modern switchers) — you simply plug in an Ethernet cable and set up your RTMP stream to YouTube, Facebook, etc. If not, you can output the program feed (from the switcher or computer) into a separate streaming device or a PC with streaming software. OBS Studio is a popular free choice that can take a multi-cam feed (or handle multiple NDI camera feeds itself) and broadcast to various platforms. vMix is another powerful software that can both mix and stream, supporting NDI and offering features like graphics, recording, and even remote guest video integration. The key is ensuring your streaming setup can handle the bandwidth of multiple camera feeds: on a local network, use a Gigabit switch for multiple NDI cameras; for internet streaming, ensure you have sufficient upload speed and consider streaming at 1080p or 720p to balance quality and reliability.
Broadcast Control & Monitoring: In an IP-based multi-camera studio, you might integrate a central control system (Ikan has partnered with QSC for studio automation, for example) to manage various devices – lights, cameras, audio – via network. This means with a touch interface you could recall presets (like lighting scenes and PTZ camera angles) instantly. For live monitoring, set up a multi-view that shows all camera feeds on one screen (most switchers and software have this feature). This way, the director or technical director can see every angle and make quick switching decisions during the live stream.
Also pay attention to latency: when using IP streams, ensure all cameras are using the same protocol and settings so they have identical latency, or that your switcher can compensate. Many NDI setups are low-latency enough for live work, but mixing NDI with SDI inputs, for example, might require careful sync adjustment.
Power over Ethernet (PoE): We’ve mentioned PoE for cameras and lights — using PoE switches or injectors can be transformative for live productions. A single network cable to a PTZ camera or an LED panel light means faster setup and fewer extension cords. Just make sure your network switch supports the required PoE standard and power budget for all connected devices. PoE also often allows remote power cycling of devices via the network interface, which can be a lifesaver if a camera or light needs a reboot and is mounted out of reach.
Incorporating these IP and streaming technologies yields a modern, efficient workflow. You could have a multi-camera church service where each camera sends video over IP to a central mixer and the lighting is remotely adjusted through a network DMX interface — all controlled by one or two people. Embracing such tech keeps your production future-proof, aligning with the convergence of traditional broadcasting and IT networks (a shift Ikan is heavily focused on). It allows system integrators to set up more turnkey solutions that clients can operate with minimal fuss.
Workflow Tips for a Seamless Multi-Camera Production
Finally, beyond the gear and tech, practical workflow habits will ensure your multi-camera production runs smoothly from start to finish. Here are some pro tips to simplify the process and avoid common pitfalls:
- Pre-production Planning: Invest time in planning your shots and setup. Create a camera plot or diagram of where each camera will be, and list its purpose (e.g., Cam1: Wide, Cam2: Close on presenter, etc.). Share this plan with your team. If you’re a system integrator setting up for a client, provide them with this documentation so they understand the layout.
- Consistency Across Cameras: Before recording or going live, synchronize settings on all cameras. Match the resolution, frame rate, picture profile, white balance, and exposure settings as closely as possible. Consistency here means when you cut between cameras, the image looks uniform (colors and brightness won’t jump around). If using different camera models, use calibration tools (like grey cards and color charts) to tweak each camera for a close match.
- Synchronization Checks: If you use timecode or genlock, verify all devices are actually receiving the sync signal and running in lockstep before the event. A dry run recording of a minute with all cameras and audio can be done, then imported into an editor to ensure everything lines up. It’s better to catch sync issues (like a lost timecode feed or an incorrect frame rate on one camera) in advance. As the saying goes, “measure twice, cut once.”
- Rehearse and Communicate: When possible, do a quick rehearsal, especially for live productions. This could be as simple as walking through the cues (“Camera 1 will start on wide, then Camera 2 will take the speaker when introduced…”) or actually practicing a segment. Ensure all camera ops and crew are on headsets or have clear line-of-sight with the director for hand signals. Effective communication ensures no shot is missed due to confusion.
- Use Tools to Simplify: Leverage modern tools – for example, if you’re a solo operator running two cameras for an interview, consider using one locked-off wide shot and one on a motorized slider or PTZ that you can control remotely. This way, you get two dynamic angles with minimal crew. Similarly, use focus peaking, exposure assist, and other camera features to nail focus and exposure quickly on all cams.
- Maintain a Tidy Setup: Label your cables and inputs (camera 1, camera 2, etc.) to avoid any mix-ups. Utilizing PoE where possible greatly reduces cable clutter, making it easier to troubleshoot and safer (fewer tripping hazards). A clean rig is not just about aesthetics – it streamlines any mid-shoot fixes and the teardown process.
- Recording and Backup: If you’re live switching, consider recording ISO feeds from each camera in addition to the switched program output. Many switchers or external recorders can do this. The ISO recordings are invaluable if you need to adjust an edit later or if something was missed in the live cut. Also, always record audio separately if possible (even if you’re streaming), as a backup. Redundancy is the name of the game in professional production.
- Post-production Workflow: For productions that will be edited, take advantage of your NLE’s multi-camera editing feature. Since you took care to sync (with timecode or clap), you can usually use an “automate to sequence” or “create multicam source sequence” function to get all angles aligned. Then, reviewing footage and making cuts feels like switching live, which is much faster than aligning clips by eye. This efficient workflow means you spend more time crafting the story and less time wrestling with technical alignment.
- Focus on the Story: Finally, remember that the technology exists to serve the storytelling or the content. As Ikan’s philosophy underscores, the studio (and its tech) should ultimately fade into the background so creators can focus on the content itself. Once your multi-camera system is set up and tested, direct your attention to the performance, the message, and the creative aspects. Empower your on-screen talent to deliver their best by creating a low-stress environment (achieved by your solid preparation). When the gear functions seamlessly, you can create without limits.
By following these guidelines, you’ll be well on your way to mastering multi-camera productions with confidence and clarity. Setting up a multi-camera system for professional video production doesn’t have to be overwhelming. With the right equipment, thoughtful placement, proper synchronization, and an IP-integrated workflow, you can achieve a broadcast-quality production that is smooth and reliable. At Ikan, we design our solutions with this simplicity and integration in mind – making advanced multi-camera setups accessible and user-friendly.
Now, armed with these insights, you can build a multi-camera workflow that brings your creative vision to life, whether you’re streaming a live concert or producing a corporate webcast.
Happy shooting!